How to use OBS WebSocket to connect with Overdeck
Overdeck has native integration with OBS, streaming has never been this easy!
![]() Rafael Bitencourt•May 02, 2024
Rafael Bitencourt•May 02, 2024


Overdeck gives you fingertip control over your OBS stream. Overdeck leverages the power of OBS WebSocket for a seamless and feature-rich experience.
Connecting Overdeck with OBS:
There are two scenarios depending on your OBS version:
- OBS 28 and above: You're in luck! OBS Studio 28 and later versions have built-in support for WebSocket functionality. No additional plugins are required.
- OBS 27 and below: If you're using an older version of OBS, you'll need to install the obs-websocket plugin first. You can find the plugin and installation instructions on the official GitHub repository here: OBS Websocket Plugin: https://github.com/topics/obs-websocket
Configuring OBS WebSocket:
Once you've ensured your OBS version is compatible, here's how to configure the WebSocket settings in OBS:
- Open OBS Studio.
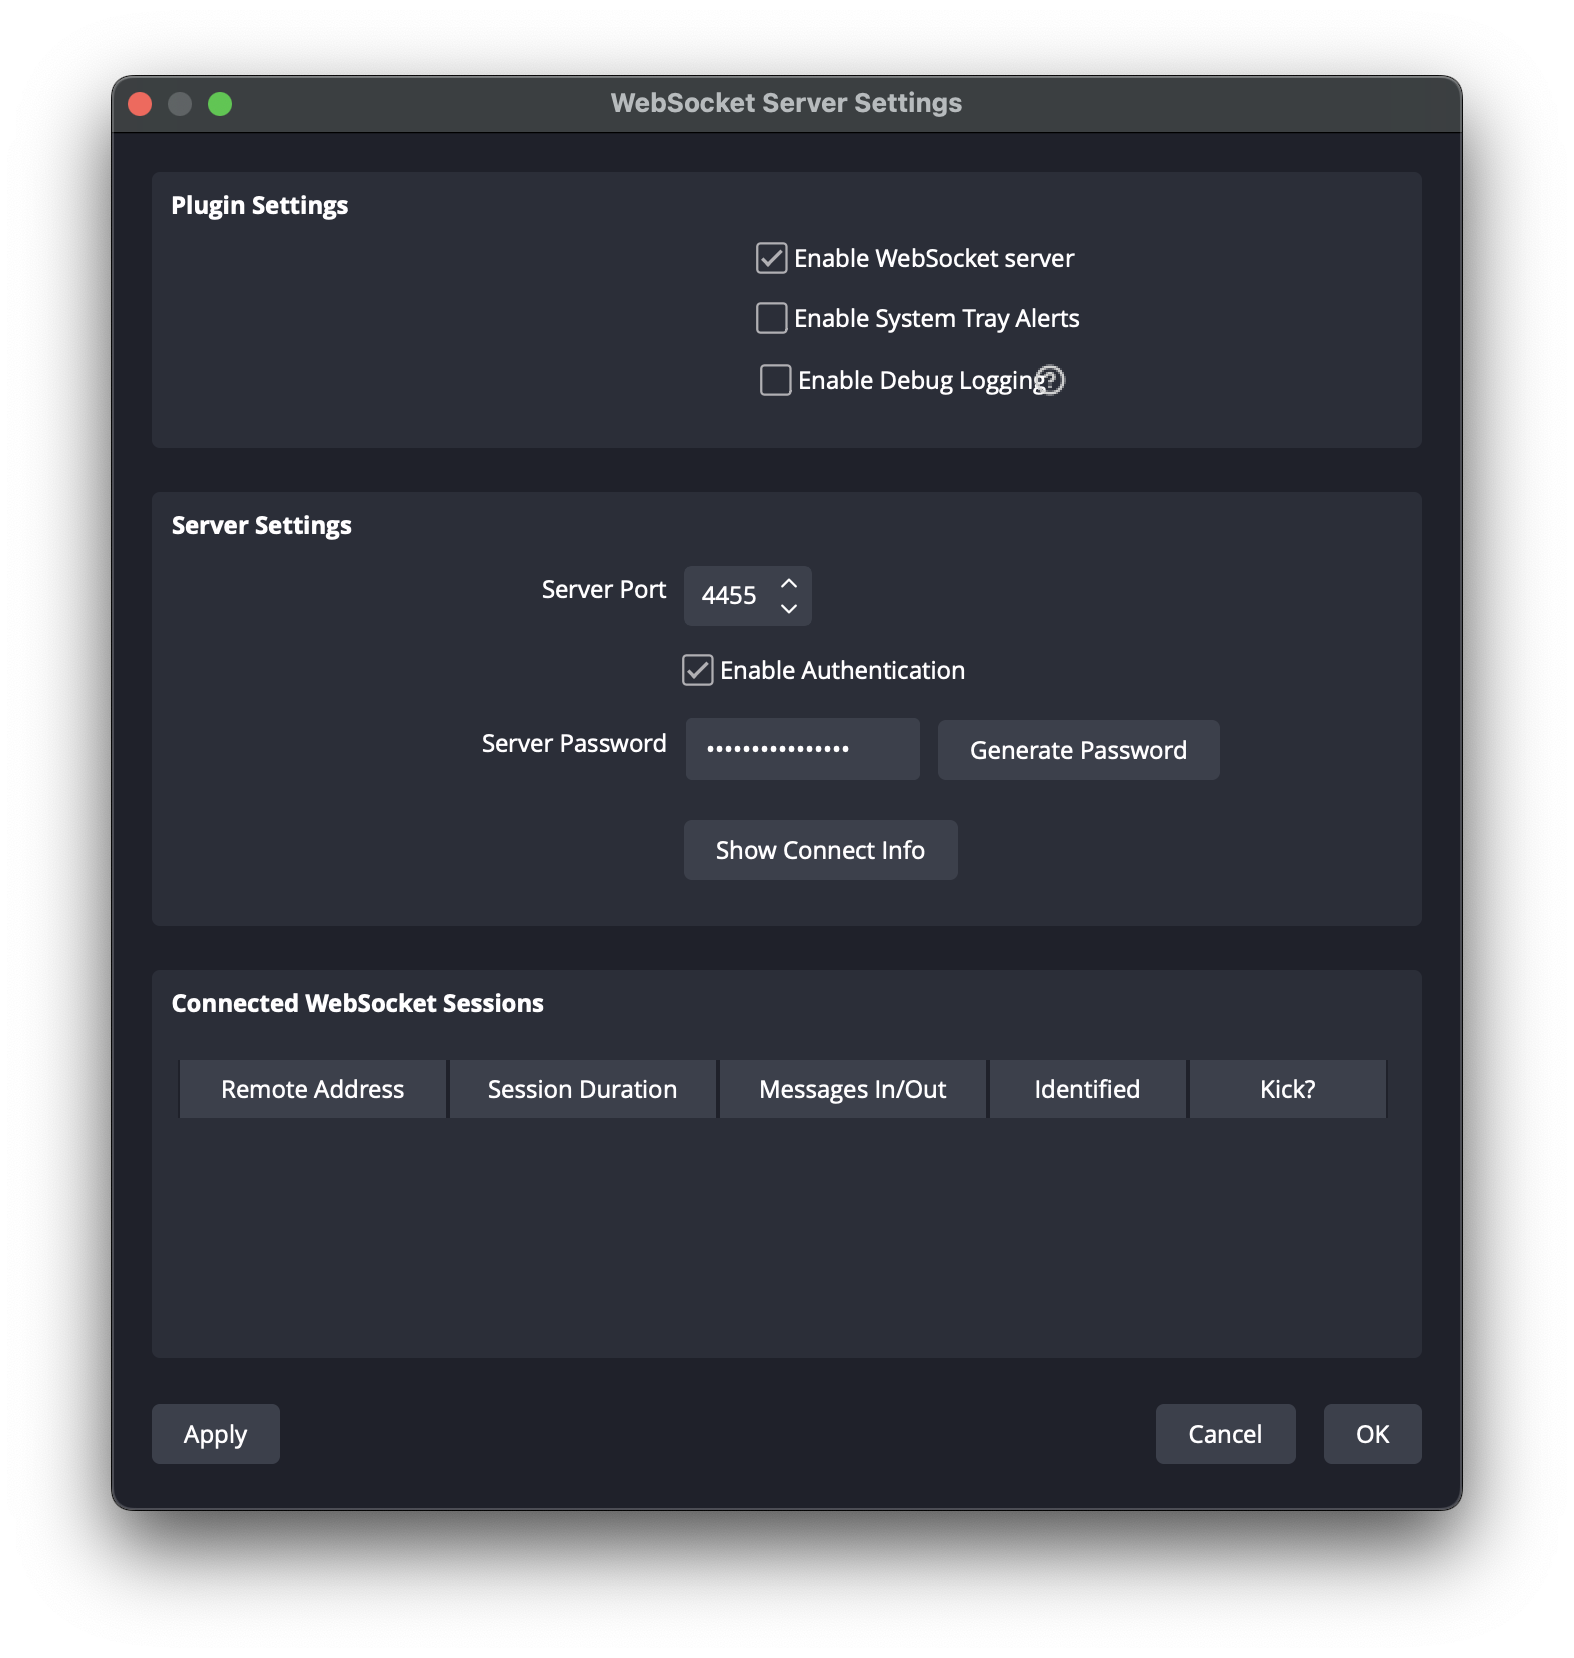
- Navigate to the Tools menu and select WebSockets Server Settings.
- In the settings window, make sure the checkbox for Enable WebSockets server is ticked.
- The default port for WebSocket communication is 4455. You can keep this setting or choose a different port for your preference.
- For enhanced security, consider enabling Authentication. Tick the checkbox next to Enable authentication and set a strong password.
Connecting Overdeck to OBS:
With OBS WebSocket configured, it's time to connect Overdeck on your computer:
- Launch the Overdeck app on your device.
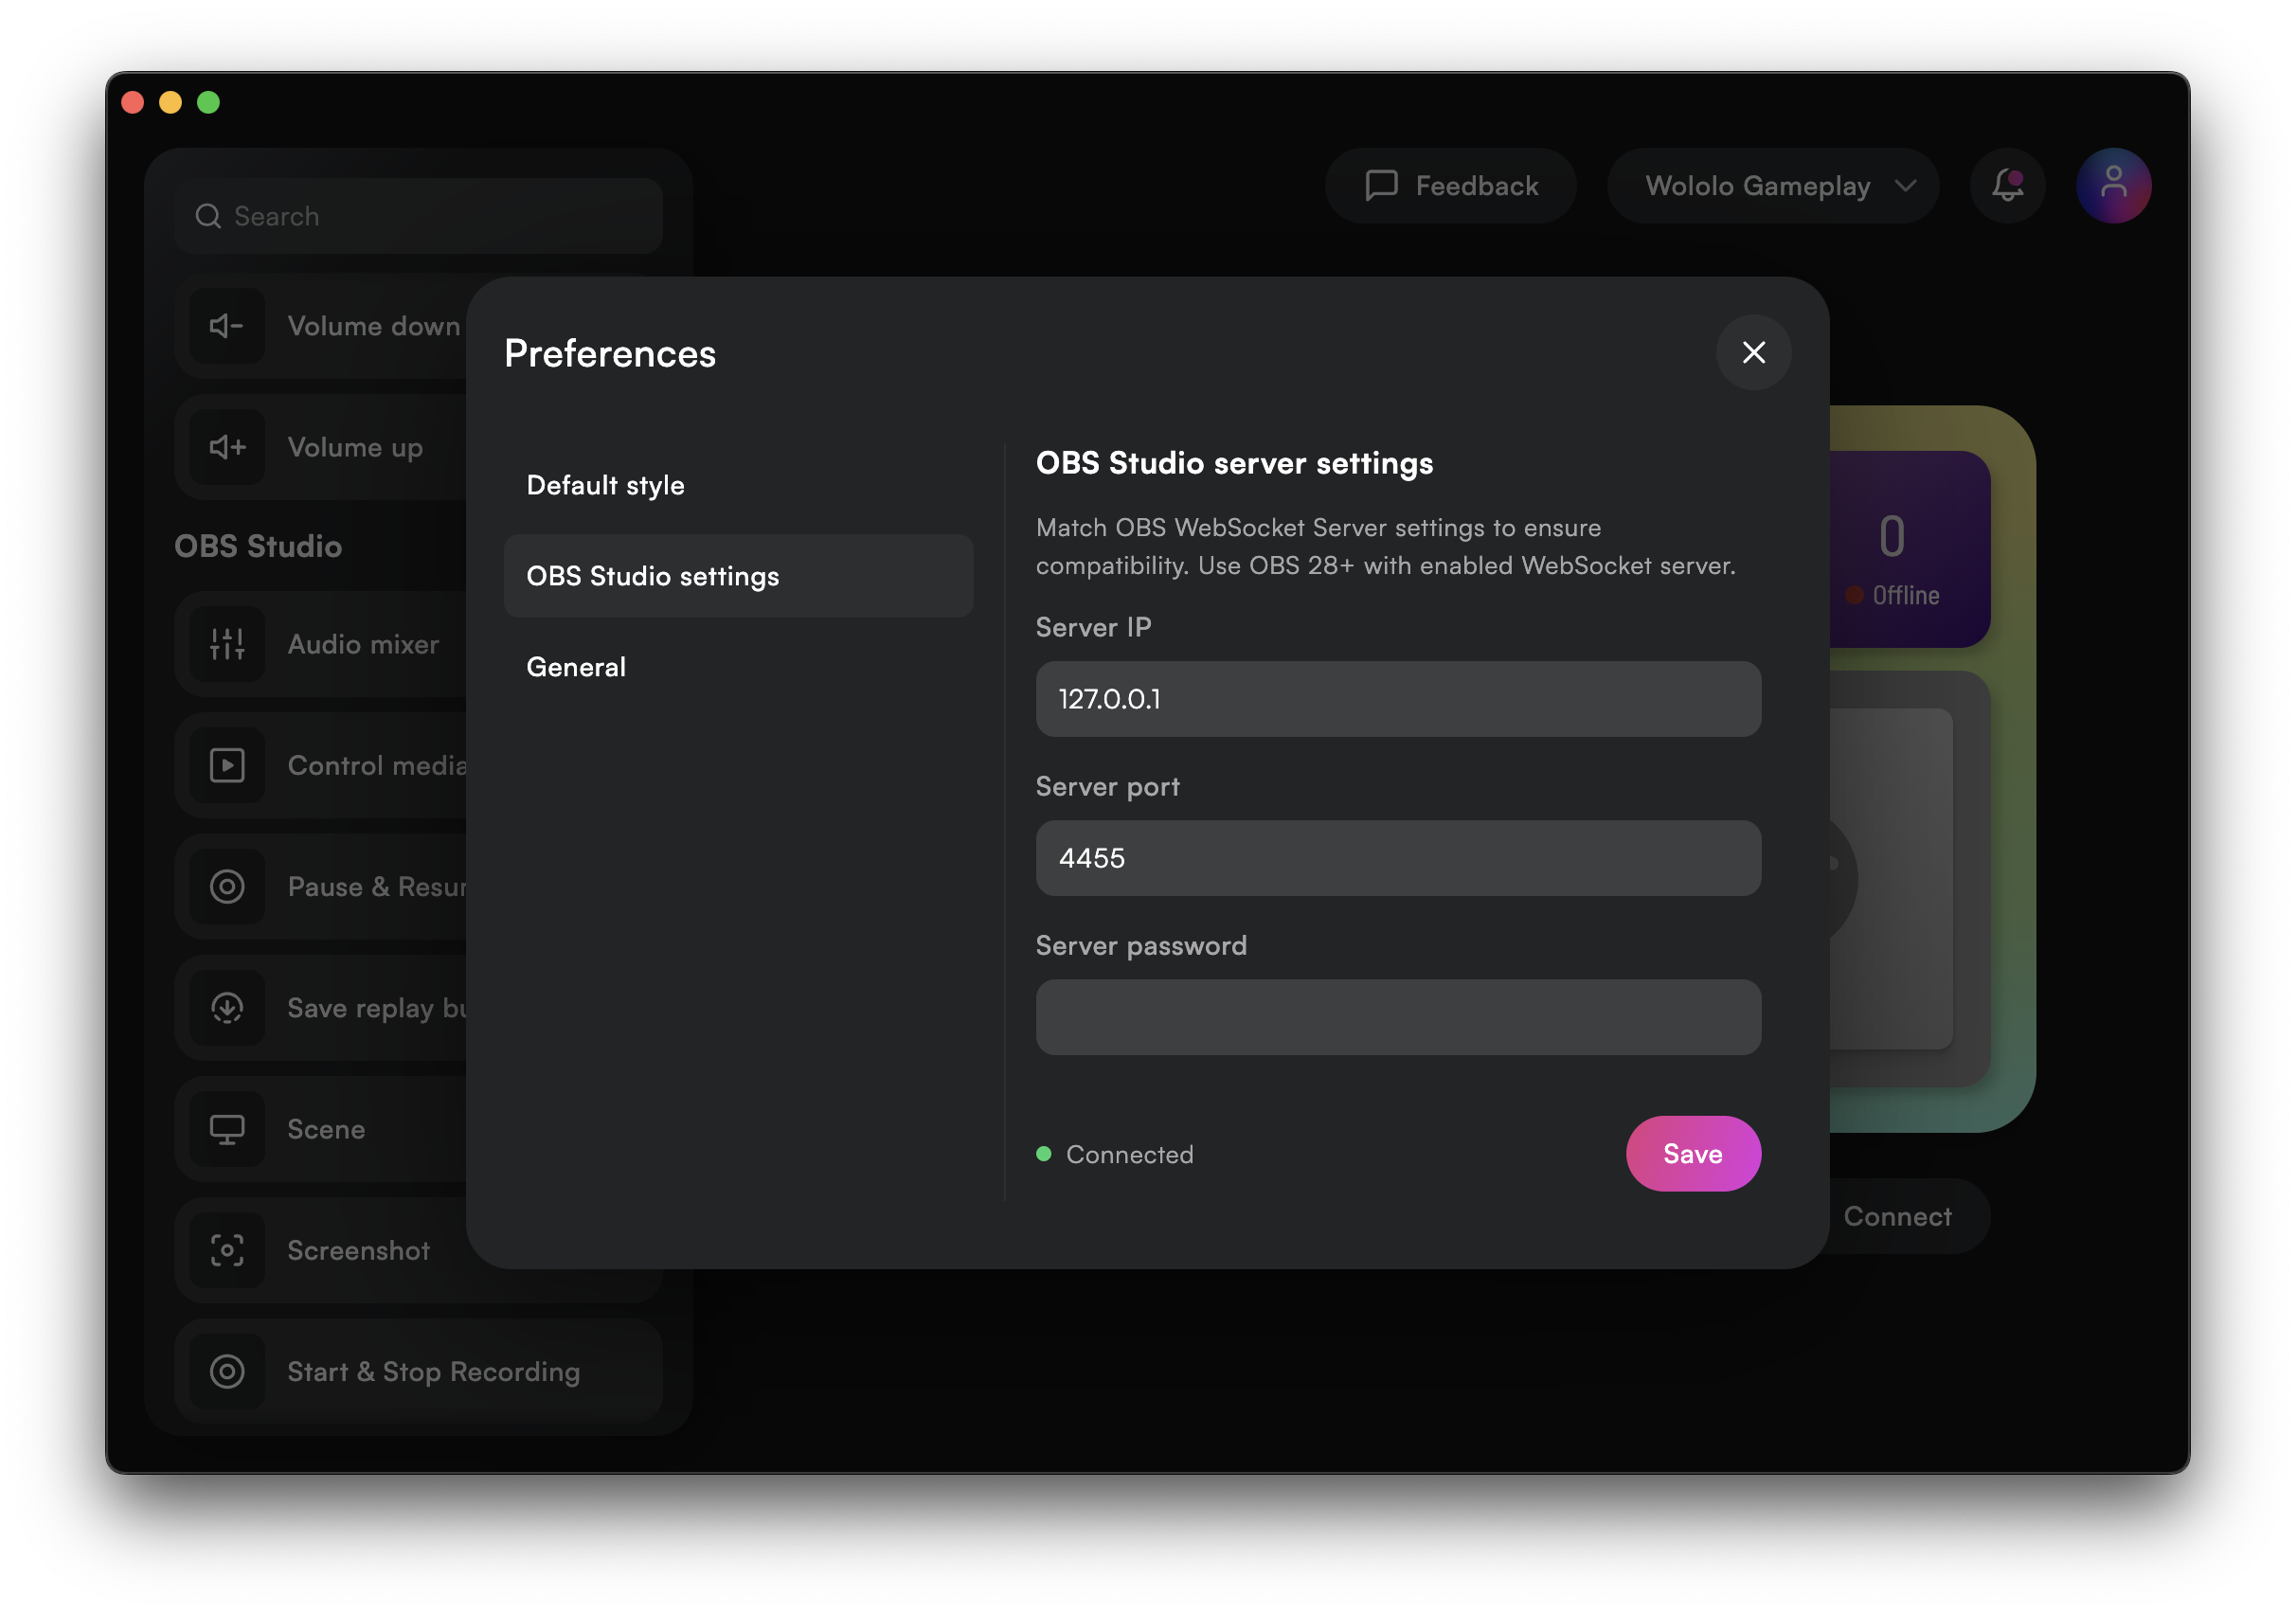
- Go to Preferences followed by OBS Studio Settings.
- In the settings, enter the following information:
- Server IP: This is your computer's local network IP address. You can find this by searching for "What is my Local IP Address?" online. You can also try using "127.0.0.1".
- Server Port: Enter the port number you configured in OBS WebSocket settings (default is 4455).
- Server Password: If you enabled authentication in OBS, enter the password you set here.
- Click the Test connection button. If successful, you'll see a "Connected" message.
Happy Streaming!
With a successful connection, all Overdeck buttons should work seamlessly, granting you fingertip control over your OBS stream. Now you can focus on delivering an engaging and professional broadcast!
Taking Control with Overdeck:
Once you've ensured your OBS version is compatible, Overdeck offers a wide range of intuitive buttons to control various aspects of your stream:
- Audio Mixer: Quickly turn on and off audio sources.
- Control Media Source: Turn on and off your media sources with ease.
- Recording Controls: Pause, resume, start, and stop recording your stream.
- Save Replay Buffer: Capture those epic moments with a single tap.
- Scene Management: Change scenes, take screenshots, and toggle studio mode for a professional touch.
- Source Control: Show or hide specific sources on your stream.
- Transition Magic: Set transitions for a smooth flow between scenes.
- Insights at Your Fingertips: View real-time OBS statistics through the "OBS Stats" widget.
- Fine-Tuning the Experience: Toggle filters, replay buffer, and sources for a customized stream setup.
With Overdeck's native integration with OBS WebSocket, you can ditch the hassle of complex configurations and focus on what matters most - delivering an engaging and professional stream.
Download Overdeck today and experience the power of streamlined OBS control!